Notifications
Service description
When remote functions such as remote horn or remote lights are operated, a notification will be sent to you regarding the operation success or failure.
The following items are available:
Setting notifications from your mobile app
Adding a new email notification option
HOME ![]() [
[  ]
]
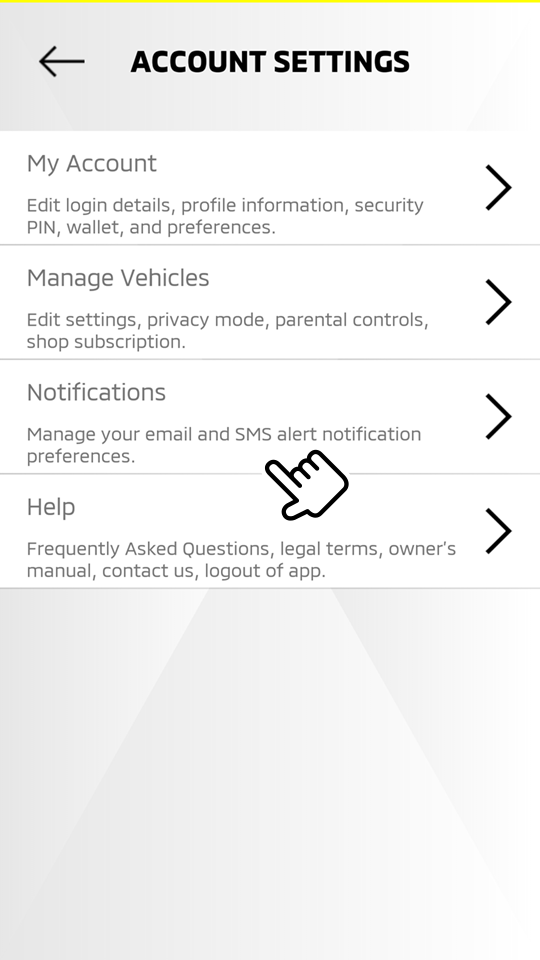
-
Select "Notifications".
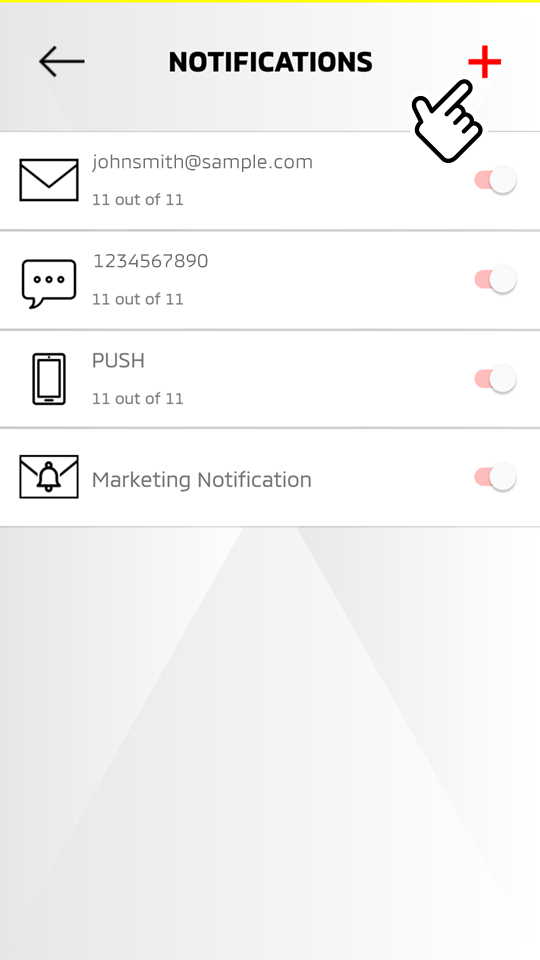
-
Select "
 ".
".
-
Select "
 Email".
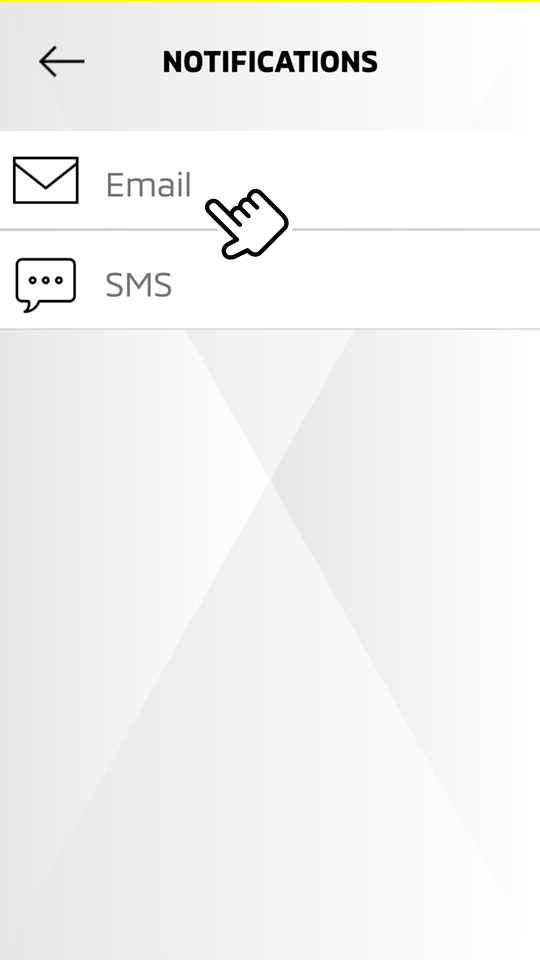
-
Select "
 SMS" if you wish to receive notifications via SMS.
Note
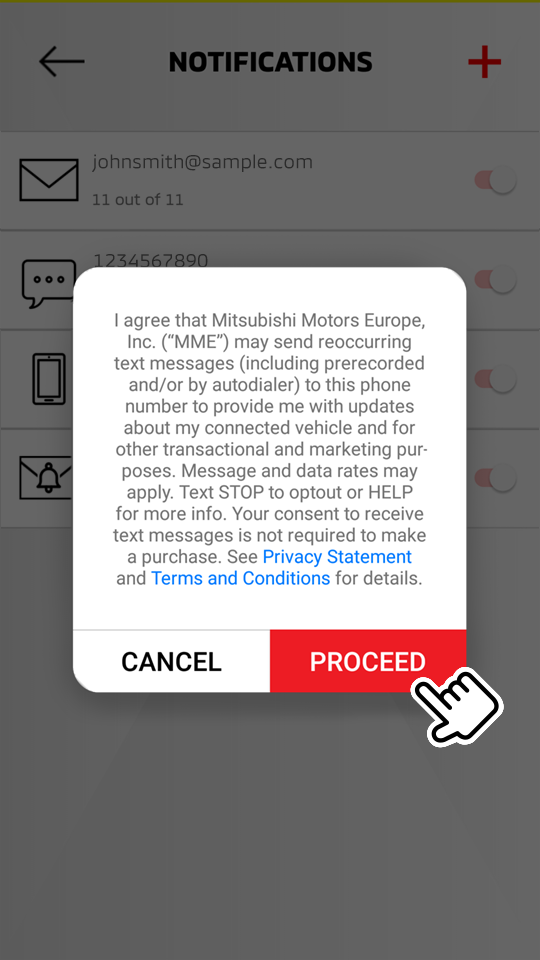
When "
SMS" is selected, the pop-up message below is displayed.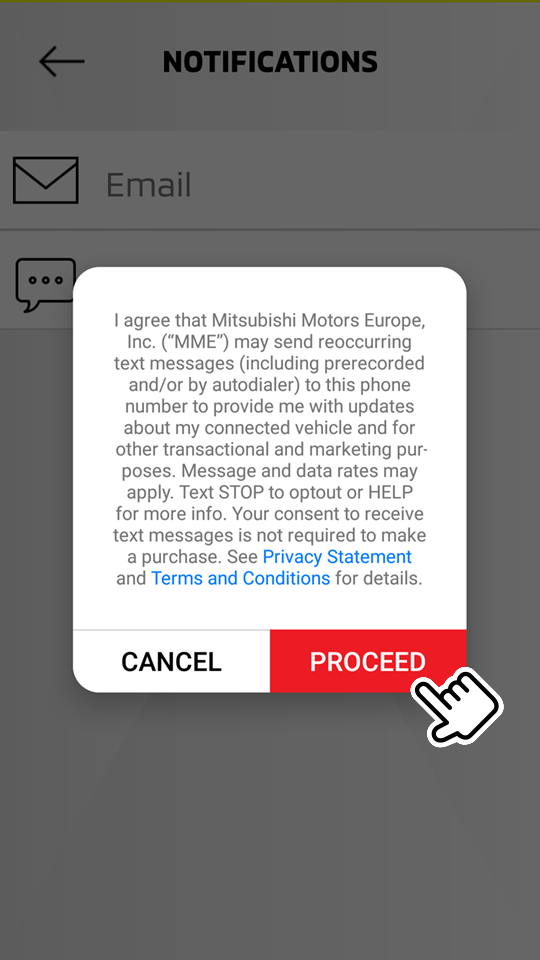
Select "PROCEED" to continue setup.
-
-
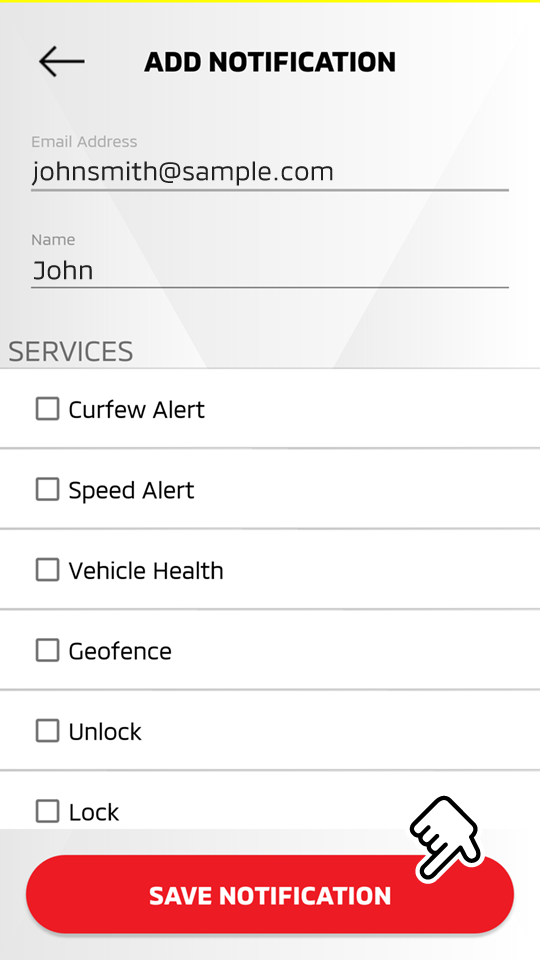
Enter the requested items regarding the person who will receive the notifications, then select the items you wish to be notified of.
-
Select "SAVE NOTIFICATION" to save the added notification option.
Editing the registered notification option
HOME ![]() [ ]
[ ] ![]() Notifications
Notifications
-
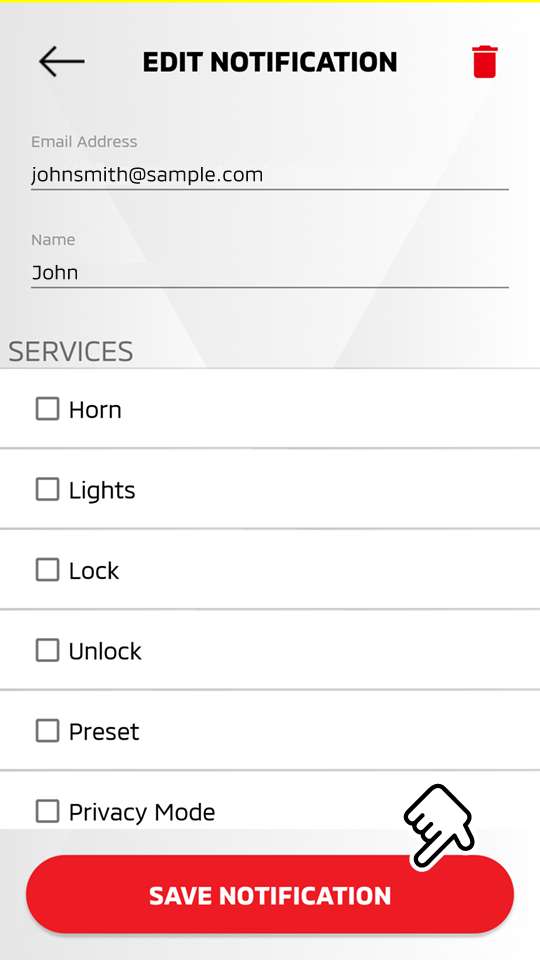
Select from the displayed icons to display the registered names and items you wish to be notified of.

-
Edit the entered items regarding the person who will receive the notification or change the items you wish to be notified of.
-
Select "SAVE NOTIFICATION" to save the edited notification option.
Disabling the registered notification option
HOME ![]() [ ]
[ ] ![]() Notifications
Notifications
-
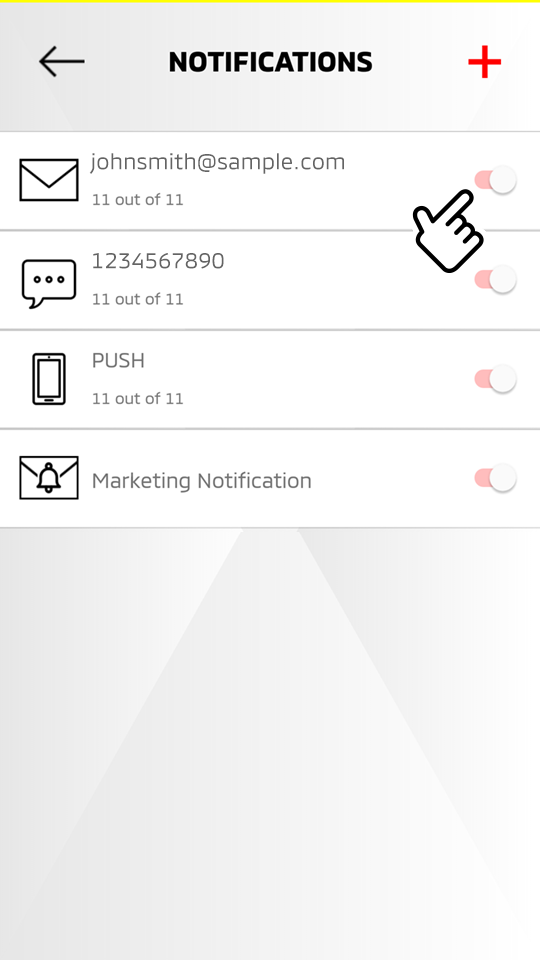
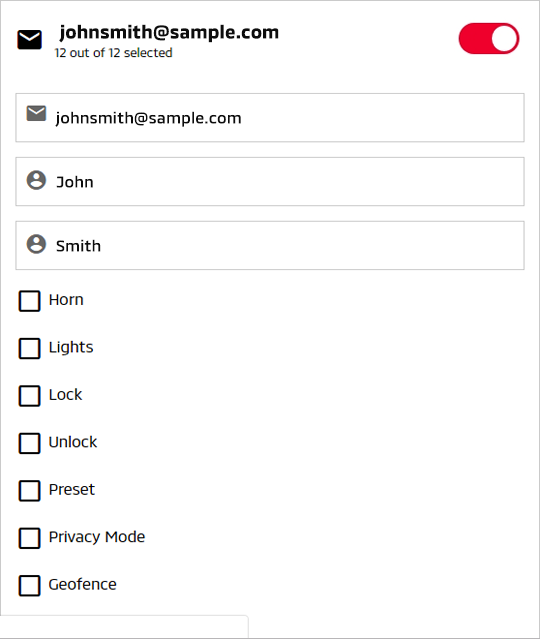
Confirm the registered notification option.
Select the displayed icons to confirm the registered names and items you wish to be notified of.
-
If you wish to disable the notification, toggle the switch to the left (OFF).
-
The switch is toggled to the left and the notification is disabled.
Toggle the switch again to enable the notification.
Disabling the push notification
HOME ![]() [ ]
[ ] ![]() Notifications
Notifications
-
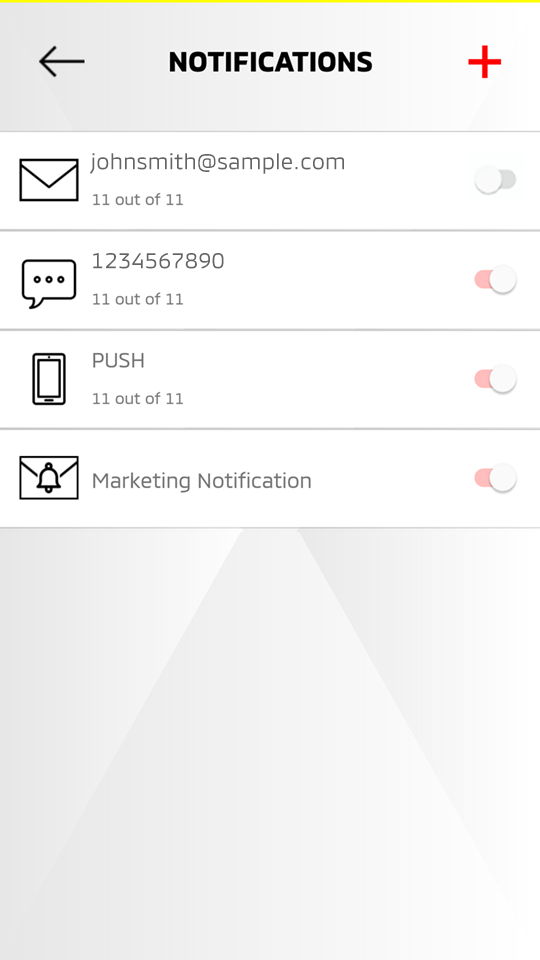
If you wish to disable the push notification, toggle the switch to the left (OFF).
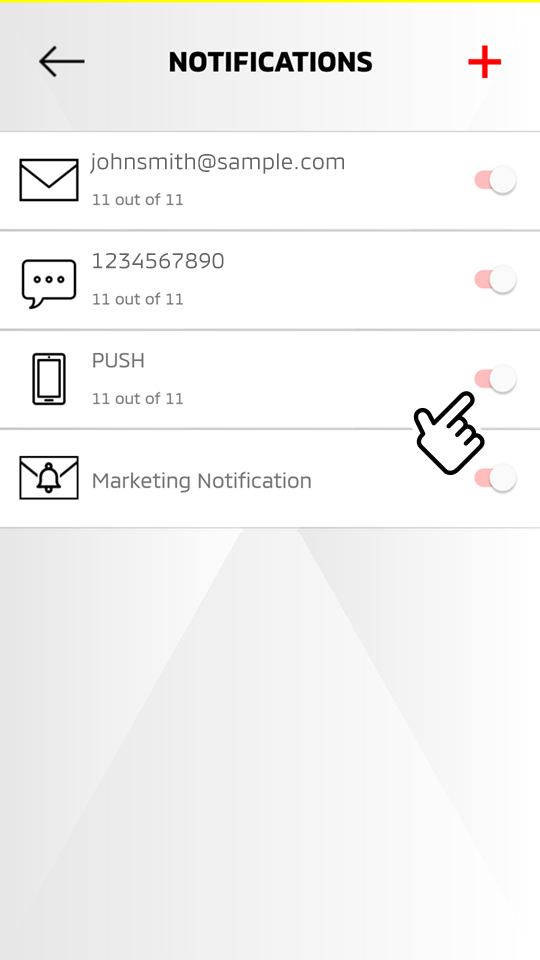
-
The switch is toggled to the left and the push notification is disabled.
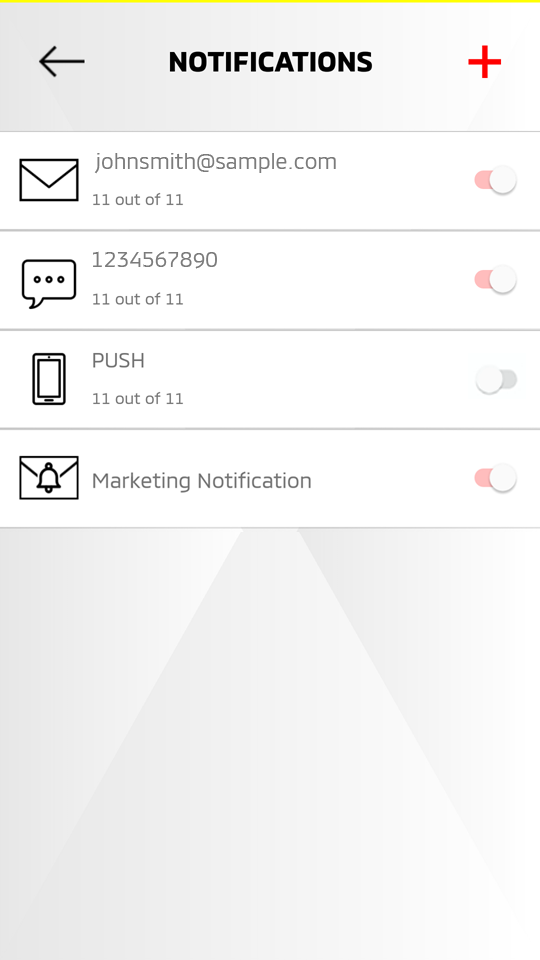
Toggle the switch again to enable the push notification.
Disabling the marketing notifications
HOME ![]() [ ]
[ ] ![]() Notifications
Notifications
-
If you wish to disable the marketing notifications, toggle the switch to the left (OFF).
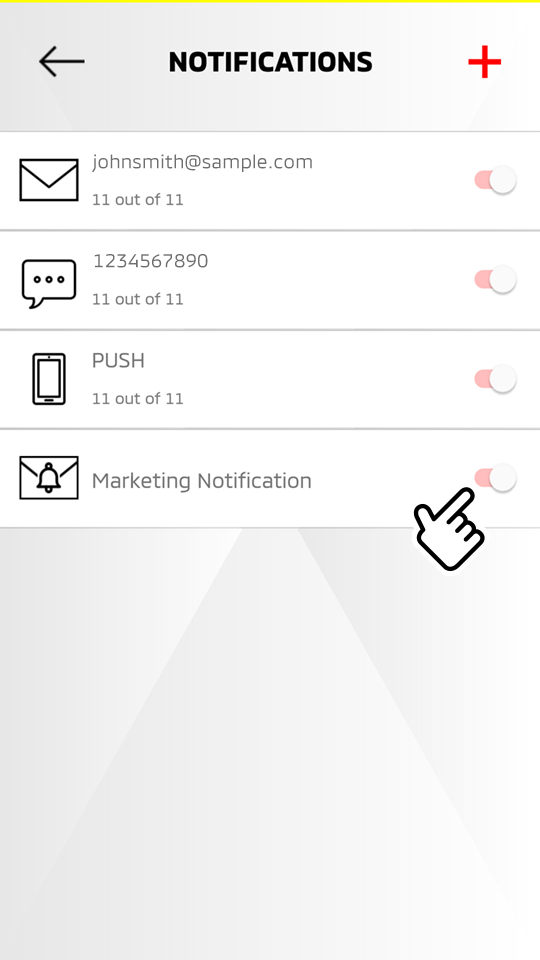
-
The switch is toggled to the left and the marketing notifications are disabled.
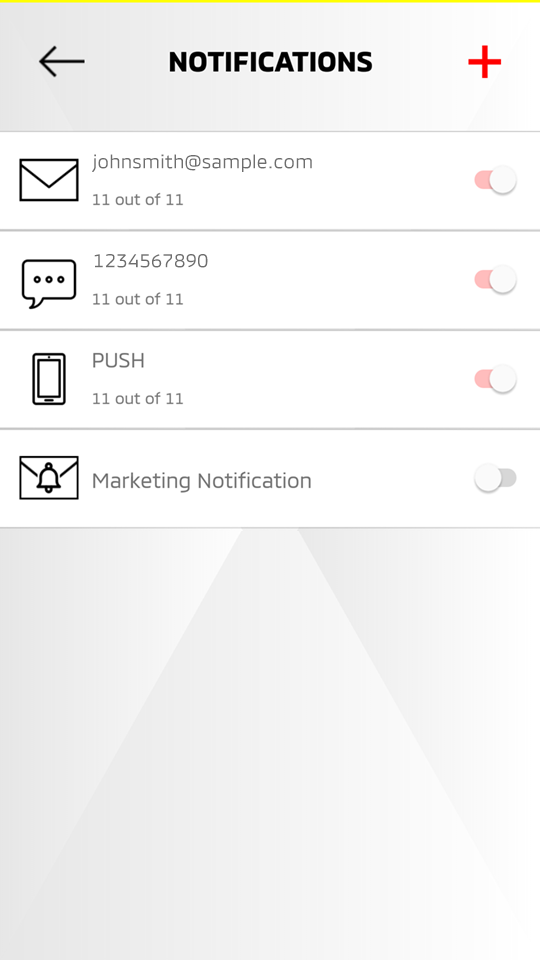
Toggle the switch again to enable the marketing notifications.
Note
When the switch is toggled to enable the marketing notifications, the pop-up message below is displayed.
Select "PROCEED" to enable the marketing notifications.
Setting notifications from the owner portal
Adding a new email notification option
Access website ![]() Login
Login ![]() NOTIFICATIONS
NOTIFICATIONS
-
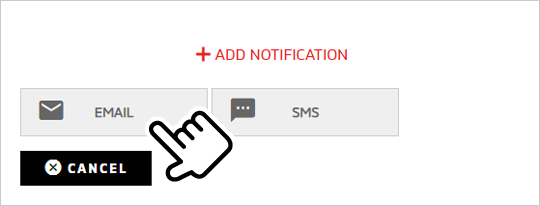
Select "ADD NOTIFICATION".

-
Select "EMAIL".
-
Select "SMS" if you wish to receive notifications through SMS.
-
Select "CANCEL" to cancel the notification settings.
-
-
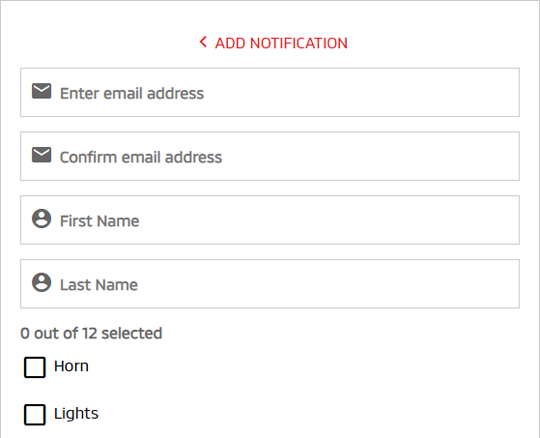
Enter the requested items regarding the person who will receive the notification, then select an item you wish to be notified of.
-
Select "SAVE CHANGES" to save the added notification option.
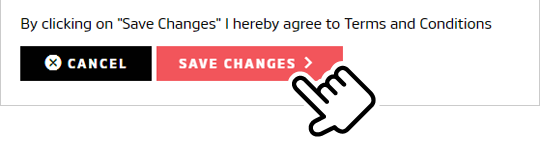
Select "CANCEL" to cancel the notification settings.
Editing the registered notification option
Access website ![]() Login
Login ![]() NOTIFICATIONS
NOTIFICATIONS
-
Select "SEE DETAILS" to display the registered names and items you wish to be notified of.

-
Edit the entered items regarding the person who will receive the notification or change an item you wish to be notified of.
-
Select "SAVE CHANGES" to save the edited notification option.
Select "CANCEL" to cancel the notification settings.
Disabling the registered notification option
Access website ![]() Login
Login ![]() NOTIFICATIONS
NOTIFICATIONS
-
Confirm the registered notification option.

Select "SEE DETAILS" to confirm the registered names and items you wish to be notified of.
-
If you wish to disable the notification, toggle the switch to the left (OFF).

Toggle the switch again to enable the notification.
Deleting the registered notification option
Access website ![]() Login
Login ![]() NOTIFICATIONS
NOTIFICATIONS
-
Confirm the registered notification option.

Select "SEE DETAILS" to confirm the registered names and items you wish to be notified of.
-
If you wish to delete the notification option, select "DELETE".